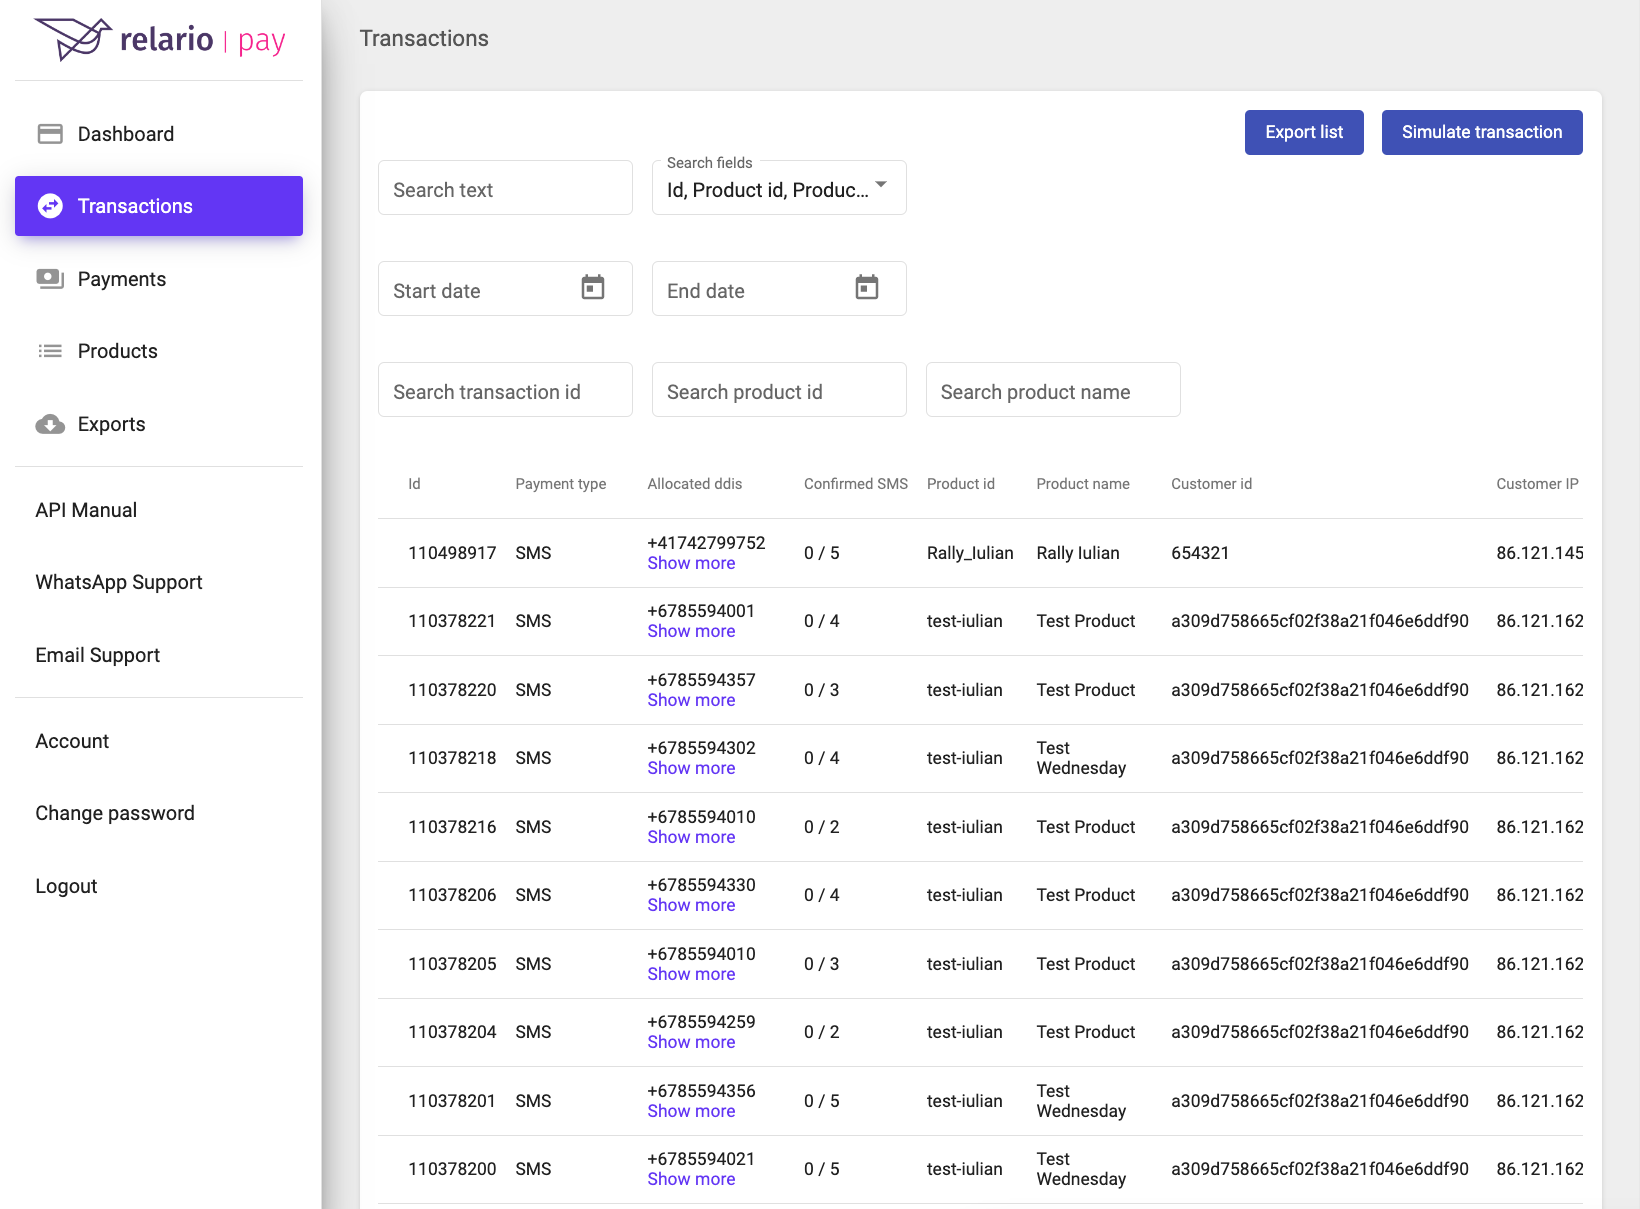
Transactions
The Transactions section in the Merchant Panel allows you to efficiently manage and track all your transactions. It provides a comprehensive table view of your transactions, along with filtering and export capabilities.
Date Interval and Filtering
Refine your view of transactions by selecting a specific date interval. This allows you to focus on transactions within a specific timeframe, making it easier to analyze and monitor transaction trends. Additionally, you can apply filters based on different fields to narrow down the displayed transactions according to your specific requirements.
Export
Initiate the export process for your transactions by using the Export List button. This generates an export file containing the selected transactions. Once the export process is complete, you will receive a notification on your registered email address.
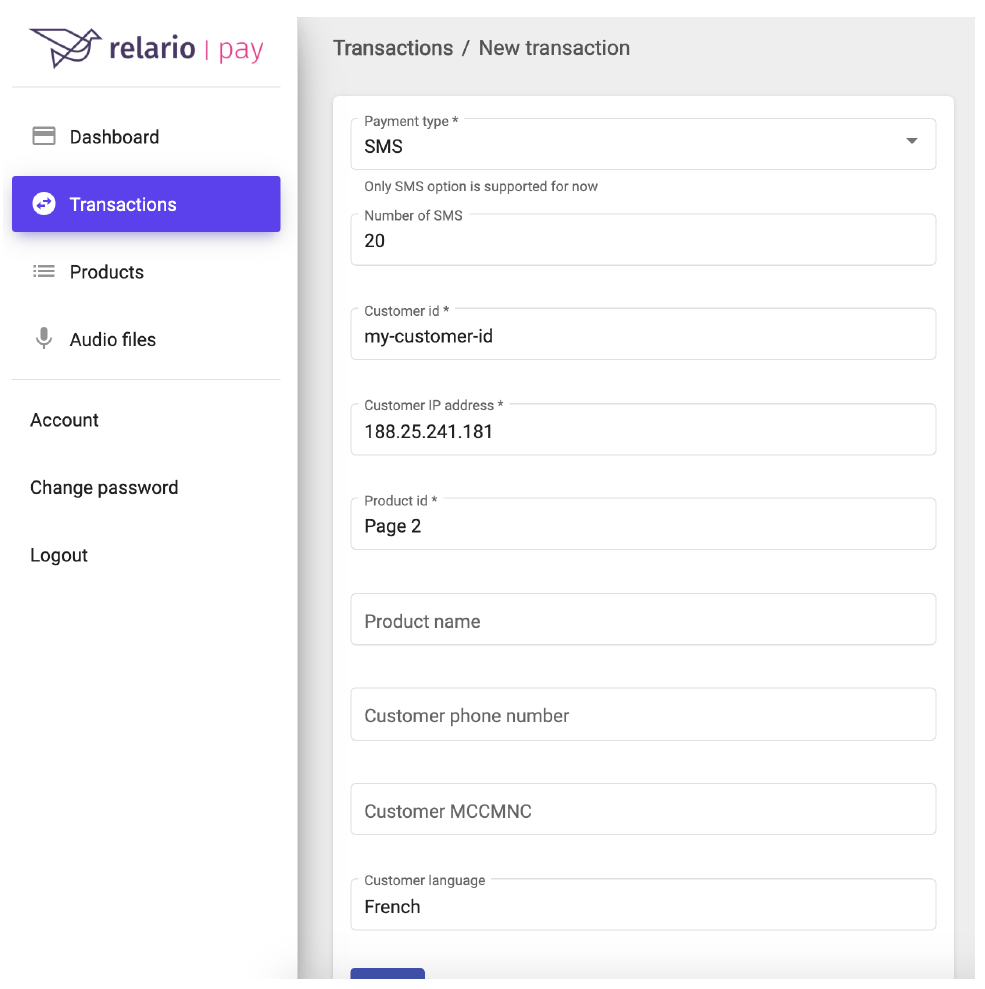
Test The Integration
To ensure seamless integration of your merchant system with Relario PAY, the Merchant Panel provides a feature to test the integration using dummy transactions. This allows you to simulate transactions and trigger payment confirmations to validate your system's response.
Create A Test Transaction
The “Simulate Transaction” feature enables you to create a dummy transaction. When you click on the "Simulate Transaction" button, a form will open, allowing you to customize the test transaction with the following fields:
- Number of SMS: Enter the number of SMS messages that the transaction will consist of. This determines the quantity of SMS units associated with the transaction.
- Customer ID: This field is provided by the merchant and can be used to uniquely identify the customer for testing purposes. You can use any identifier of your choice in this field.
- Customer IP Address: Enter your IP address in this field. This helps simulate the IP address of the customer initiating the transaction.
- Product ID: Select a product ID from the options defined in the Products section of the Merchant Panel. This field ensures that the test transaction is associated with a specific product.
- Product Name: Enter a name for the product in this field. You can use any descriptive name to represent the test product.
- Customer Phone Number: Enter the phone number of the sender or customer initiating the test transaction. This field simulates the phone number associated with the transaction.
- Customer MCCMNC: The Mobile Country Code (MCC) and Mobile Network Code (MNC) of the sender can be entered in this field. This helps simulate the sender's mobile network information.
- Customer Language: Select a language from the dropdown menu to simulate the language preference of the sender.
Complete The Test Payment
After submitting the previous form, you will be able to observe the transition in the transactions table. To simulate an SMS for a specific transaction, follow these steps:
- Locate the desired transaction in the transactions table.
- Click on the three dots located in the last column of the transaction row. This will open the context menu.
- From the context menu, select the "Simulate SMS" option. A new modal will open, allowing you to simulate an SMS for the selected transaction.
The Simulate SMS modal includes the following fields:
- CLI (Caller Line Identity): This field will be automatically populated with the "Customer phone number" provided in the previous form. It represents the phone number from which the SMS will be sent.
- DDI (Direct Dial-In): This field presents a list of available Direct Dial-In numbers (DDIs). The number of DDIs listed depends on the number of SMSs you specified in the previous form. Choose the appropriate DDI(s) for the SMS simulation.
- SMS Body: This field contains a unique string generated by our platform. It serves as an identifier for the payment and helps associate the SMS with the corresponding transaction.
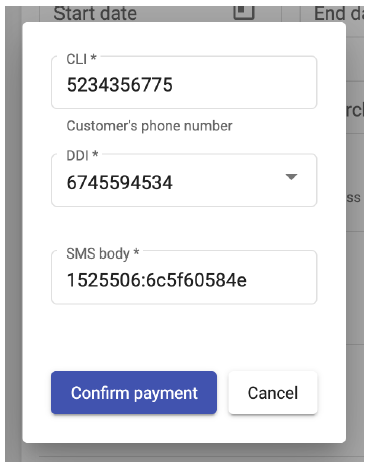
To complete a payment, you need to repeat these steps for each DDI listed in the modal, simulating an SMS for each DDI.
For each payment confirmation, the merchant’s system should be notified by relario PAY with an HTTP request.